Contents
How To Make Piped Cushions Easily

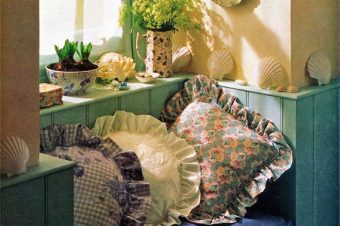
Piping made from a contrast color picked from the cushion looks smart; made from the same fabric it gives a classic finish; while striped or checked fabric cut on the bias adds a jaunty touch. Read more below on How To Make Piped Cushions.
Piped Cushions are one of the simplest soft furnishings to sew and one of the quickest ways to update an existing scheme – either by introducing a new color or a new style. Piped or frilled, lace-edged or bordered, each finish will give a different character to a room.
First, decide on the cushions’ function – are they just a decorative addition to a sofa or a bed, or will they need to be more practical, for example, to soften hard dining chairs, or to provide additional seating? The size and shape of the cushion depends on the answers to these questions.
Secondly, choose the fabric – match the cushion cover fabric to your other furnishings or go for a complete contrast of color and pattern. Brighten up a neutral color scheme with a riot of colorful covers or add just a subtle hint of color with a paler hue taken from the main color in the room.
Cushion pads and fillings
Nowadays it is easy to buy cushion pads in a range of shapes and sizes – square, rectangular and round, with or without gussets. You can choose the filling to suit your needs – most purchased cushion pads contain either a natural feather mixture or a synthetic filling such as polyester. A feather-filled pad will give a cushion that soft, inviting look and can be quickly plumped back into shape. Polyester filling is more practical as it is completely washable and is a must for people with allergies.
Adding piping
One of the simplest ways of transforming a plain cushion cover is with a line of piping round the outer edge. Piping will give the cushion a good outline, a professional finish and add strength to the seams. Decorative piping can be bought ready-made or you can make your own by covering a length of cord with a bias-cut fabric strip.
Piping cord comes in a range of thicknesses from 00 to 6; sizes 3 or 4 are the most suitable for decorative sofa cushions, but try to match the thickness to the size of the cushion. Take the covering fabric with you to the haberdashery department and wind it round the cord to gauge the effect. If you prefer more prominent piped cushions or have large cushions to edge, you can use a thick cord or a roll of wadding, which will give a fat piped edge. Traditionally, piping fabric covers the cord smoothly, but you can also gather the fabric, giving a slightly frilled edge to the cushion.
The covering strip is cut on the fabric bias – across the grain – so it will have enough ‘give’ to go round the cord and round the cover without puckering.
Making Up Piping
1. Fabric quantities
For the width of the covering strip, measure round the cord and allow an extra 2.5cm (1in) for seam allowances. For the length, measure round the cushion cover, allowing an extra 2cm (3/4 in) for joining.
2. Cutting the bias strips
Fold the fabric diagonally, so the cut edge lies along the selvedge. With your hand flat against the fabric fold, cut along the fold. Both diagonal edges are now cut along the fabric bias. Mark the required strip widths along the diagonal edges and cut out.
3. Joining strips together
Fabric strips must be joined together on the straight grain. Place strips with right sides together; pin and stitch with a 6mm (1/4 in) seam allowance. Press seam open. Trim off the points.
4. Covering the cord
Fold the fabric strip in half round the cord with wrong sides together. Pin and stitch close to the cord using a zip foot attachment on the sewing machine to keep stitching close to the cord.
5. Joining piping
To join piping together to fit round the cover, trim off both cord ends so they butt together. Bind over the ends to hold them firmly in place with sewing thread. Trim the covering fabric so one side overlaps the other for 2cm (3/4 in). Turn under 1cm (3/8 in) and place over raw edge. Pin and stitch over join.
7. Square cushions
On a square cover, pin the covered piping to the right side of the top cover piece, with cut edges together and the stitching on piping 1.5cm (5/8 in) from the outer edge of the cover. At each corner, snip into piping fabric up to stitching. Using a zip foot, stitch along first side to the corner, work one stitch across corner and then stitch along next side. Repeat for the other two sides. If the fabric is thick, work two or three stitches diagonally across the corner to help cover to turn through the corners.
8. Round cushions
On a round cover, place the covered piping to the cover in the same way as for square cover. Snip into the piping fabric up to stitching at about 2.5cm (1 in) intervals, to help curve the piping round the edge. Stitch around piping using the zip foot.
Reference: The Country Look—Decor & Crafts


3 Responses
9 Steps For A Stunning Webbing Cushion - Crafting DIY
[…] with small squares of fabric or ribbon fused to the background behind the webbing strands. The cushion is completed with a neat piped edge and fastens at the back with […]
Janek
We have a re-upholster dining chairs story in hand and will publish it asap
dubmecrazy3
My mother & I have been considering how to lighten up the living/eating space, & I was thinking that it may be possible to reupholster the dining chairs. These are generally antique wood & have cushioned seats. The seats don’t have piping, however there is a back board on it which does have piping. How would we reupholster?