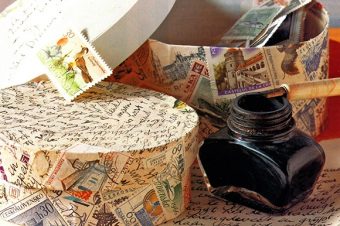
How to do Crockery Mosaics
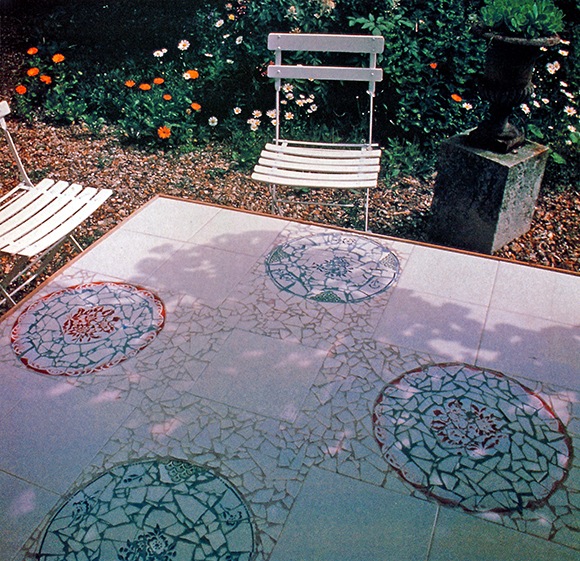
Here, the fragments of four shattered dinner plates have been put to good use and attractively recycled as part of a tiled garden table-top.
NB. A word of caution before you start, broken crockery pieces can be as sharp as glass so take care to wear protective gear when doing this project.
Crockery Mosaics is the ancient art of creating patterns and images from thousands of tiny fragments. Traditionally, special, uniform little pieces of marble, glass or ceramics were used to assemble the gloriously ornate mosaics that still grace the domes of Byzantine churches and elaborate floors in the remains of Roman villas.
Pebbles, stones, shells and beads were also widely employed for adorning walls and paths in a much less formal fashion.
However, you need not be restricted to using classical materials or methods. For a rather more casual but highly decorative effect, you can arrange particles of broken pottery, china or tiles in a similar way to build up perfectly functional, colorful and long-lasting mosaics on many surfaces.
1. Broken crockery
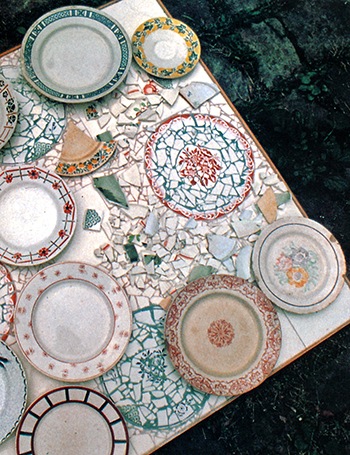
A close-up of the table top with a few plates and broken pieces that were bought from a local junk shop.
Apart from occasional household breakages, junk stores, jumble sales, auctions and charity shops are all rich sources of odd or cracked plates and job lots of discontinued crockery can be used for Crockery Mosaics. The crockery itself need not be expensive, unusual or even pretty. Plain colors, floral designs, geometric patterns and ornate borders can all look attractive and interesting when mixed as part of a mosaic. Sticking to a single color or pattern theme can be equally effective. One joy is that the conformation and fit are entirely at your discretion.
Large plates and saucers are best — the flatter the better, because the curvature of cups and rounded bowls is difficult to incorporate into a level surface. Each piece should be as flat as possible; the flat base of a plate will provide fairly large pieces while the curved rim must be broken into smaller fragments to lie flat.
2. The art of crockery mosaics
The basic technique of Crockery Mosaics is just arranging and sticking the separate bits of broken china in place and is quite straightforward. The small ceramic fragments are pressed into a bed of concrete, plaster or tile adhesive.
Bold, basic patterns work best, especially when working with their regular shapes and sizes of broken ceramics which lend themselves to creating fairly free, abstract designs.
Don’t feel limited to straight lines; sweeping curves in coils, twists and circles work perfectly. Let the shape of the pieces suggest their own pattern.
3. Applying ceramic mosaics
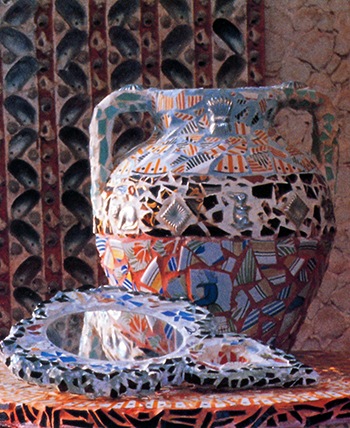
This handsome urn and mirror are adorned with mosaics comprised of umpteen scraps of broken crockery.
Ceramic mosaics can be used to decorate practically any surface from floors, walls and ceilings to table-tops, picture frames and pottery, both indoors and outside.
With a little time and patience, you can assemble a ceramic mosaic to decorate any surface where full ceramic tiles are commonly used as a splash-back behind a work surface in the kitchen, backing the basin in the bathroom, as a panel along the side of the bath or an inset round a fireplace and hearth.
The function of the object or location of the surface will dictate certain aspects of the design.
While table and work tops or floor mosaics must have a smooth, even surface, mirror frames, table legs and vases can be more irregular and flamboyant. Some pieces like teacup handles can be set to jut out.
4. Grouting
Once the pieces are in position, the final step is to grout the entire mosaic to fill in the gaps between the pieces.
Special waterproof tile-grouting cement is used to create a smooth finish. It can even be colored to suit the design.
The grouting is spread over the whole of the mosaic, making sure all the gaps are filled and the surface is level. Excess grout is removed with a damp cloth.
Although the grouting could be considered incidental to the design itself, it does in fact occupy quite a large area of the pattern and plays a crucial part in guiding the observer’s eye through the composition.
If you remember this as you are arranging the mosaic pieces, you can keep the spaces between them equal and fluid.
4. Useful tools
You will need a sharp pair of tile pincers to trim the ceramic pieces for a good fit. Take care to protect your eyes from stray slivers with goggles.
A mallet or hammer is invaluable for breaking up the plates and a pair of tweezers is useful, but not essential, for positioning the pieces accurately.
A thick ceramic tile adhesive or cement provides a firm bed for the ceramic pieces. A good depth of adhesive helps to keep the surface of the mosaic level and smooth.
Always follow the maker’s instructions about adequate ventilation when you are using an adhesive.
You may prefer to wear rubber gloves when working with tile cement and grout as these can be slightly caustic. A small trowel and a spreader are required for mixing and spreading the tile cement, adhesive and grout.
Reference: The Country Look—Decor & Crafts


3 Responses
Janek
The best thing to use that is quick drying and will adhere to the box is tile adhesive.
Death Knight
Ok, what I wish To do is decorate a box with broke jewelry & broken china, ect. ect. I don’t simply wish To paint the box & glue stuff down, must I use something like…mortar? the box & embed the objects inside it. It is difficult to explain. However I would like to understand what I can use and if there are any tutorials on doing anything like this. I am sure I have seen a box prepared like this, & I think they could have done it with an air-drying clay considering it was a shimmery gold color. Would clay even stick to the box?
Well it cant be grout, this box looked like whoever did it made a thick layer of some sort of clay & then pushed the objects into the clay. I am thinking it should be some sort of self-drying clay. I guess I must post a pic of the box & then ask.
nyyankees1123
I’m making an effort to re-use rather than re-cycle and need several different bright ideas on what to do with stuff.
So far I re-use jars whenever I create jam plus chutneys plus I cut 2 lt bottles inside 1/2 to make indoor planters, nevertheless I’d like a bunch more tips…10 points to the many inspiring and useful ideas 😀