How to Make A Frilled Cushion
Insert the piping with the frill – the method used is the same for circular or square cushions.
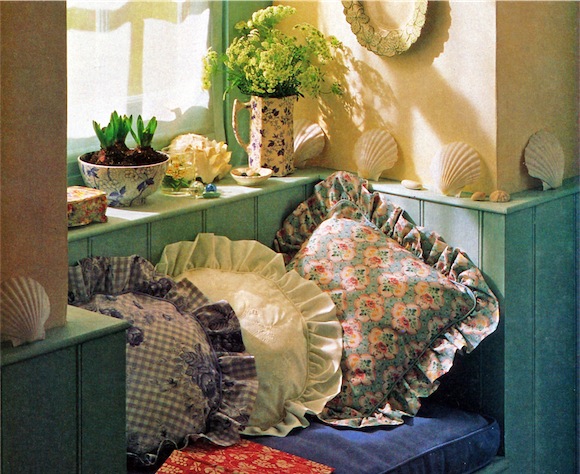
Cushions, and a frilled cushion are the most versatile of home furnishings. They are synonymous with comfort, color and style. Wherever they are placed, cushions have an immediate softening impact. Yet by trimming cushions in one of a variety of ways, they can be specially tailored to enhance individual rooms in your home.
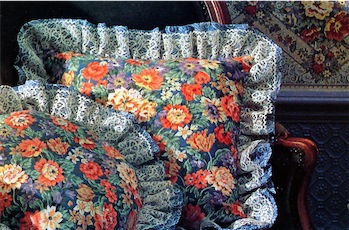
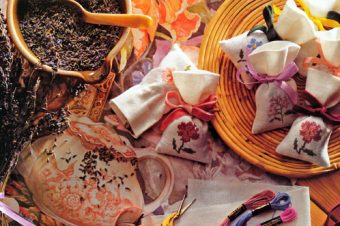
Purchased lace, slightly narrower than the frill, can be added for a softer finish. Pin the lace to the frill after it has been hemmed but before gathering. There are so many different designs of lace – soft and romantic, bold and chunky – so choose a style to suit the furnishings in the room.
Even the most basic frill can be adapted to different decorative styles. For example, lace frilled cushions brings frivolity and romance to a bedroom, while a piped frill in a contrasting fabric adds a bold, cheerful finish to a cushion on a kitchen chair.
The simplest frills are made from a single layer of fabric with a neatened outer edge. They can be bound with a contrast edging, finished with a double hem, or with decorative machine stitching such as closely worked zigzag stitch, or one of the attractive edge stitches found on the newer machines.
A single frill produces a crisp finish while a double frill gives a fuller, softer edge. It is made from a folded strip of fabric and is stitched to the cover in the same way as a single frill.
Making a Single Frilled Cushion Cover
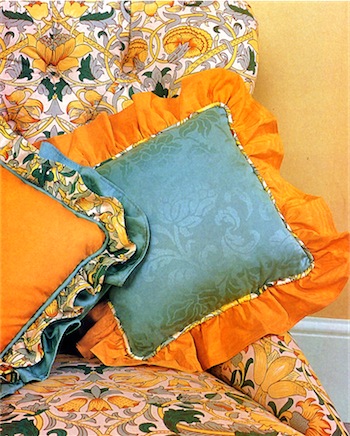
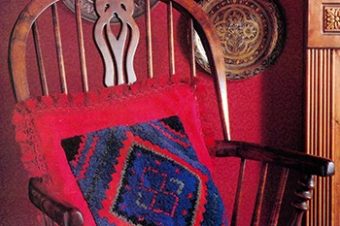
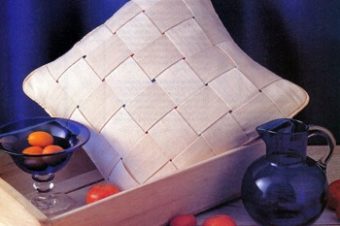
Taking a lead from the upholstery, this pair of cushions shows two variations of piped and frilled finishes. A length of covered piping cord can be inserted between the frill and the cover. Make up the piping and tack round the front cover before adding the frill. The fabric is quite stiff so hemmed single frills have been used with the one-sided printed fabric backed with the reversible plain.
1. Calculating the frill
Measure round the cover and allow twice this for the frill length. The frill width is a matter of personal choice, but you will find that a frill wider than7,5cm (3in) will be too floppy unless you are working with lace for bed frilled cushions. Add an additional 3cm(1in) for double hem and seam allowance. Any extra needed for joining strips together should be included in the frill length.
2. Cutting out the strips
Cut the fabric strips on the straight of the grain – across the fabric width, from selvedge to selvedge. Working from the wrong side, using a meter stick and tailor’s chalk or marking pencil, measure and mark the strips across the fabric. Cut out carefully along the marked lines.
3. Joining the strips together
The frill strips must be joined together into a ring to fit round the front cushion cover piece. Pin and stitch the frill strips together with narrow French seams. If the pattern is distinctive, try to match the designs over the seam.
4. Hemming the frill
Turn under1cm (3/8 in) all round the outer edge of frill. Turn under another1cm (3/8 in), forming a double hem. Pin and tack hem in place. Either machine stitch or hem the frill by hand with small invisible stitches.
5. Gathering the frill
Work two rows of gathering stitches along the length of the frill.
6. Stitching frill to front cover
Cut out one cover piece in the same way as for piped cushions. With right sides together and raw edges matching, pull up gathering stitches to fit round the cushion cover and pin. Check that the gathers are evenly spaced. On square covers it may be necessary to allow extra gathers to go round each corner. Tack and stitch the frill to the cover.
7. Making a non-fastening back opening
Make a cut-out paper pattern and test it for size on your curtain first. Fold paper pattern in half and cut as for piped cushions. Place pattern on fabric and cut out, adding 6cm (2in) to both center edges. Turn under and stitch a double 1cm (3/8 in) hem along both center edges.
8. Completing back cover
To keep opening taut after pad is inserted add press studs or velcro to the opening. With right sides up, overlap the hemmed edges for 4cm(1 ½ in) and attach fastening; then pin and tack together along outer seam lines.
9. Finishing off
Place back to front with right sides together, sandwiching the frill. Pin and stitch together all round, making sure that the stitching matches or is worked inside the previous line of stitching. Trim seam to reduce bulk of gathering and turn cover right side out. lnsert the cushion pad through back opening.
>
>
Reference: The Country Look—Decor & Crafts

2 Responses
Double Frilled Cushions – 5 Hints - Crafting DIY
[…] for your frilled cushions you have chosen fabric that is medium to heavy weight, the long gathering threads may […]
How to Make Piped Cushions In 8 Steps - Crafting DIY
[…] Piping cord comes in a range of thicknesses from 00 to 6; sizes 3 or 4 are the most suitable for decorative sofa cushions, but try to match the thickness to the size of the cushion. Take the covering fabric with you to the haberdashery department and wind it round the cord to gauge the effect. If you prefer more prominent piped cushions or have large cushions to edge, you can use a thick cord or a roll of wadding, which will give a fat piped edge. Traditionally, piping fabric covers the cord smoothly, but you can also gather the fabric, giving a slightly frilled edge to the cushion. […]