How to Make Rag Rugs
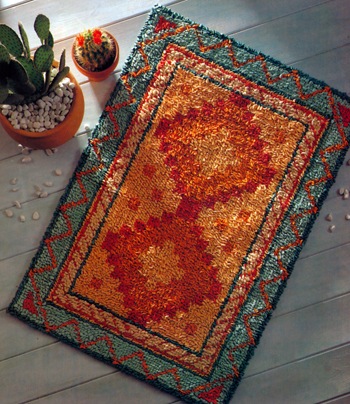
Narrow strips of glazed furnishing cotton, in a range of burnished colors, are hooked through an open-weave canvas to create this rug with its geometrical design.
This is how we make rag rugs. It’s hard to imagine that this impressive rug could have been made from fabric scraps, but the pile is simply constructed from narrow strips of fabric hooked through an open-weave canvas.
As the name suggests, rags were always used in the past to make these homespun rag rugs. Even now, fabrics leftover from soft-furnishing projects are ideal for making a rug to match a particular color scheme. But to copy this design exactly you will need to buy fresh cotton chintz fabric in each of the colors specified in the materials list.
The secret of the success of this delightful rug is that none of the frayed fabric edges show. An inexpensive binding maker will fold them away to the back of the strips so that only the neatened edges show when they are looped through the canvas. It’s all so simple. The finished size of this rug is 96 x 68cm (38 x 27in).
How To Make the Rag Rug
Materials
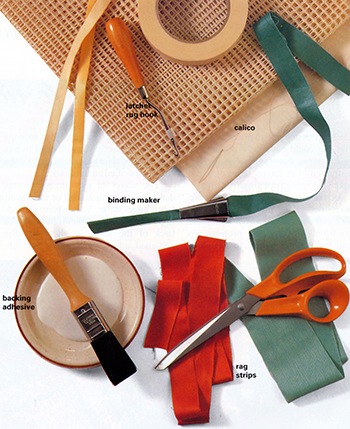
A selection of materials and tools that are needed to do this project.
Cotton furnishing chintz as follows:
1.90m (2yd) of 122cm (48in) wide orange,
2.40m (2 ½ yd) of 140cm (56in)wide peach,
1m (1yd) of 122cm (48in)wide cream,
140m (1 ½ yd) of 140cm (56in) wide turquoise,
1.90m (2yd) of 122cm (48in) wide pale turquoise,
1.40m (1 ½ yd) of 140cm (56in)wide terracotta
Rug canvas 114 x 81cm (45 x 32in) with 3 1/3 holes to 2.5cm (1in)
Latch rug hook and adhesive tape
Trimming and binding maker 13mm(1/2 in)
Large dressmaking scissors
Meter (yard) stick and marking pen
Rubber solution adhesive
Calico 114 x 81cm (45 x 32in) Sewing thread to match calico
Once you have purchased the fabrics and canvas very few other items are needed to make this delightful rug. A rug hook is essential and the binding maker will ensure the rug looks smart when finished. The adhesive is used to secure the hooked fabric in place on the back of the canvas when the rug is completed.
Rag Rugs Step By Step
1. Cutting the strips
Cut out 2.5cm (1 in) wide fabric strips from each fabric, cutting from selvedge to selvedge (an edge produced on woven fabric during manufacture that prevents it from unraveling). Cut out seventy-two strips of orange, eighty-seven strips of peach, thirty-nine strips of cream, forty-one strips of turquoise, seventy-six strips of pale turquoise and fifty strips of terracotta.
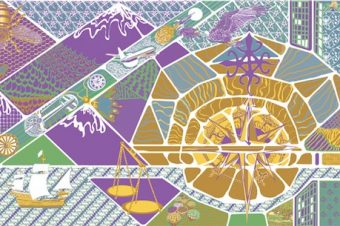
2. Marking the canvas
Use a felt-tip pen to mark the center of the canvas both ways. Then using pens in the fabric colors, mark the design centrally on to the canvas.
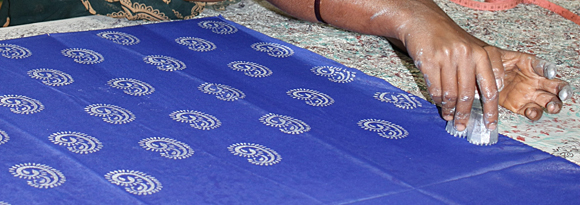
3. Preparing the rag strips
Feed each fabric strip in turn through the trimming and binding maker, pressing the folded strip as it emerges with an iron, so that the raw edges are folded to the center of the wrong side. To store the strips, wind each one over a piece of cardboard and fasten the end with a pin.
4. Preparing the latch hook
Before you begin hooking the fabric strips through the canvas, tape the hinged latchet part of the hook against the shaft of the hook. You only need the hook section to work this type of rag rug. You may find a crochet hook could be used instead.
5. Beginning to hook
Begin hooking the rug from one end, 5cm (2in) in from the edge. On the first row, work from the center outwards. Hold the first prepared strip behind the canvas, with raw edges facing down. Push the hook through the hole of the canvas and pull through enough fabric to form a loop of the chosen height.
6. Forming the rug loops
Push the hook through the next hole and pull through the next loop of fabric. Make sure that the loop is the same height as the previous one. Repeat this method across the canvas.
7. Working each binding length
Continue in the same way, following the chart and working one section of color at a time. At the end of a fabric strip, pull the raw end through the canvas to the right side. Begin the next strip by looping it in the same hole.
8. Hiding the ends
Complete the rug, keeping all the loops of fabric tight and even. Tuck each raw end under a nearby loop so that it is hidden from view.
9. Adding the adhesive
Turn the rug over and generously coat the back with adhesive to bond the rags in place. Leave to dry. To neaten the edges, turn in and stick the spare canvas diagonally at each corner, then turn in sides and stick. Trim off excess canvas, as necessary.
10. Stitching on a backing
Cut a piece of calico to the same size as rug, plus 1cm (1/2 in) all round. Press 2cm (3/8 in) to the wrong side on each edge. Pin to rug with wrong sides together. Slipstich calico to rug.
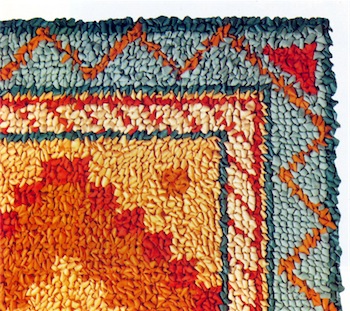
Tight loops
It is important that the fabric loops fit tightly in the canvas holes. We used a glazed cotton furnishing fabric which was ideal. Check that your chosen fabric will fill the holes; if not, use wider strips.
You can read more about Rag Rugs and Rug Making.
Reference: The Country Look—Decor & Crafts


One Response
Tapestry & Crochet Rugs - Crafting DIY
[…] a rug is how to narrow down the field. Choose a style which goes with the decor—a plaited rag rug looks particularly good in an uncluttered, Shaker style room, while a tapestry rug has an elegant […]