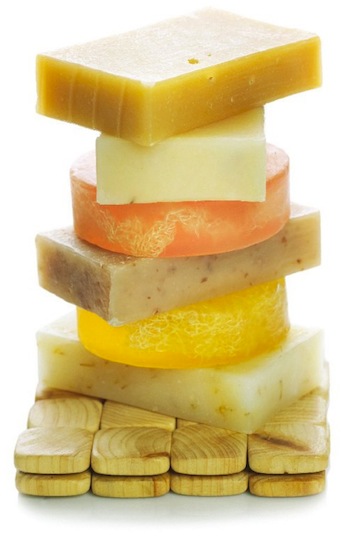
Making Soap with this Easy Soap Recipe
We did a lot of searching to find the best easy making soap recipe that will suit any beginner.
This is a simple making soap method and recipe and could turn out to be one of your all time favorites. These can make wonderful gifts to give to friends all year round.
You could even start a small home industry making soap and sell to local stores and at farmers markets. No store bought soap can beat the blend of natural skin care oils that makes for an incredible soap that you will be proud of.
***WARNING! Please, first read the safety precautions at the end of this article before doing any of the soap making step-by-step processes.***
Firstly the basic ingredients you need for this making soap recipe, these can be purchased from your local drugstore/pharmacy:-
Olive oil (26.5 ounces or 751.25 grams)
Coconut oil (16.5 ounces or 467.75 grams)
Palm oil (10 ounces or 283.5 grams)
Lye (sodium hydroxide) powder or microbeads (7.4 ounces or 209 grams)
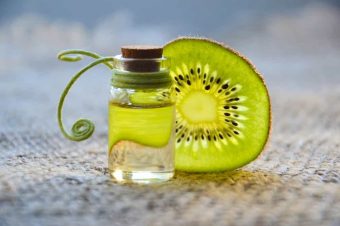
Your choice of essential oils (2.7 ounces or 76.54 grams – optional scent)
Distilled water (20 ounces or 567 grams)
Let’s start with the step-by-steps For Making Soap
1: Weigh Lye
Weigh out the 7.4 ounces (209 grams) of dry lye (sodium hydroxide), do this on a digital scale so that you will be accurate. Use a plastic bag that can be re-sealed as this weighs very little and won’t affect your measurements.
2: Weigh Water
Weigh out the 20 ounces (567 grams) of distilled water in a heat safe (pyrex type) container, do not use a metal bowl.
3: Pour Lye Into Water
Gradually pour the lye from the bag into the water and keep stirring the solution briskly. You can use a kitchen silicone, heavy duty rubber, or wooden spoon or paddle. When making soap mix well until all the lye has been dissolved in the water. Be careful at this stage as the reaction between the lye and the water will cause this solution to heat up.
4: Reduce Temperature
Now put a thermometer in the lye/water solution and put on one side in a safe place for later. Wait for the temperature to reduce to about 95 degrees Fahrenheit (35 degrees Celsius) only then will the mixture be ready to use.
5: Add Oils
Measure out the 26.5 ounces (751.25 grams) of olive oil, 16.5 ounces (467.75 grams) of coconut oil and 10 ounces (283.5 grams) of palm oil. It will be easier to do this in separate glass bowls.
6: Melt Coconut and Palm Oils
The coconut oil and palm oil are usually solids and must be melted into a liquid form in the 3 quart (3 liters) saucepan when making soap. Use a low heat to do this so that you don’t burn the oils.
7: Pour Oils
Check the temperature of both the lye mixture and the oils and try to get them both to 95 degrees Fahrenheit (35 degrees Celsius). When all the oils have fully melted you can then pour the liquid into a large soap making saucepan and put your thermometer back into the mixture.
8: Add Lye/Water
Transfer your lye solution to a pyrex pouring jug to make it safer and easier for this step. Slowly add the lye/water solution to the oils mixture that are now in the large soap making pot. Continuously stir in a zig-zag pattern to ensure that the lye and oils are blending while you are doing this step.
9: Check For Trace
Now you need to watch for trace. What is “trace”? Trace is a sort of “point of no return” in the soap making process. Once your soap “traces”, the mixture will not separate back into the original oils and lye-water. You can test for trace by dipping your spatula or spoon into the mix and dribble a bit of it back into the pot. If it leaves a little “trace” behind, you’re there. Some people describe the “trace” as a little mound of soap that takes a second or two to disappear back into the mix. When this happens then “saponification” [a chemical reaction that turns (fat or oil) into soap by reacting with an alkali.] has taken place and your soap is ready.
**A note here: You might have to stir for up to an hour or as little as 10 minutes before you see the “trace”. Recognizing “trace” is the most difficult part of any cold process soap making project, especially for the beginner.
When making soap keep testing for “trace” every 5 – 10 minutes to ensure that you don’t miss it. Why must I test so often? If you stir your soap too long after trace has occurred, your soap will begin to harden and will not stay liquid in your pot so you won’t be able to pour it into the soap making mold.
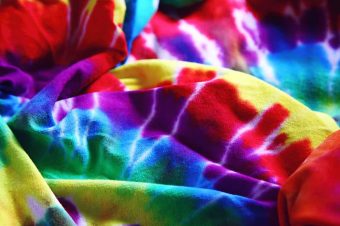
10: Add Color etc.
This is an optional step. At this stage you can add essential oils, nutrients and colorants if you want immediately after you notice trace. There are loads of natural additives available and you can personalize this as you like.
11: Stir
If you do add extra ingredients to your mix then stir the soap briefly until an even texture and color is achieved.
12: Pour Into Molds
Now you can quickly pour the soap into your molds. The quantities will be enough for a 5 pound (2.2 Kg) soap recipe, so you should use a 5 pound (2.2 Kg) mold.
13: Seal Soap
The next step is to insulate your soap. Make a lid from a piece of cardboard or heavy duty freezer paper and place this on top of the mold to seal it from the air. Wrap the whole thing in a few blankets or several towels to insulate it.
14: Rest Soap
The soap must now rest undisturbed for approximately 24 – 36 hours.
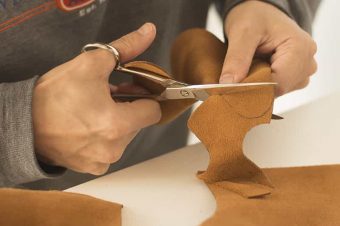
15: Cut Into Bars
After this time your new soap should firm enough to slice. Take off all the coverings and the lid and remove from the mold and place on an even work surface. Now cut into slices roughly the size of most commercial soaps. A spring steel rectangular paint scraper is ideal for this job.
16: Let Soap Cure
Let your bars of soap cure fully by placing them on cake cooling racks. Turn them over approximately once a week. Your soap should be fully cured after about 4 – 6 weeks, and be ready for use. If you notice any white powder that may have formed on the skin of the bars of soap, you must remove this before using or selling it. This is soda ash and some skins can be damaged and dry out from this.
17:Test The PH
Testing the PH of your soap is a good idea when you are starting out. The PH of most facial soaps is neutral 7, body soaps 8-10 and laundry soaps higher than this.
Types of Soap
Castile Soap is a name used in English speaking countries for olive oil based soap made in a style similar to that originating in the Castile region of Spain.The origins of Castile soap go back to the Levant (Eastern Mediterranean Region) where Aleppo soap makers have been making hard soaps from olive and laurel oil for millennia.
Nabulsi soap is a type of Castile Soap produced only in Nablus in the West Bank, Palestine. It’s chief ingredients are virgin olive oil (the main agricultural product of the region), water, and an alkaline sodium compound.
Black Soap, also known as African Black Soap (Anago Soap, Alata Simena,or Ose Dudu), has long been used to heal problem skin.
Black soap is made from the ash of locally harvested plants and barks such a plantain, cocoa pods, palm tree leaves, and shea tree bark.
First the leaves and bark are sun-dried and then roasted in a kettle or pot at an even, constant temperature, which is important to ensure color, texture and smell.
Then water and various oils – palm oil, coconut oil, palm kernel oil (including shea butter and cocoa pod powder) – are added to the mixture and stirred for at least a day.
PRECAUTIONS AND SAFETY TIPS
Some basic rules that you should follow when soap making:
1. Lye (sodium hydroxide) is an extremely caustic chemical that will burn your skin upon contact. It is always used in both the cold and hot soap making process. Use rubber gloves when handling this chemical and do not let it touch you in any way.
2. Get to know your other ingredients, there are other substances used in soap making such as some essential oils that could be dangerous.
3. It is always a good idea to wear protective clothing and avoid any contact with lye, or any other harmful substance, wear rubber gloves, goggles, and thick outer wear.
4. Keep all your soap making equipment separate and label them all “for soap making use only”. You do not want to mix them up with your kitchen equipment.
5. Vinegar is essential to have nearby so that if you spill any lye you can pour some vinegar over the mess and this will neutralize the chemical and render it harmless.
6. Do not be distracted when you are making soap, keep children, pets and even husbands/wives out.
7. Keep all hazardous substances in a safe place. Make sure that it is out of the reach of any children.
8. Let your whole family know about soap making and teach them what the potential dangers are and how you should all practice soap making safety.
9. Use common sense. Do not leave the work area or any chemicals or solutions unattended and don’t burn yourself with the hot soap and so on…


2 Responses
Making a Pomander 3 Steps - Crafting DIY
[…] Making Soap Easy Step By Steps […]
Soapmaking Books - craftingdiy.com
[…] Making Soap Easy Step By Steps […]