How To Make New Cushions From Old Clothes

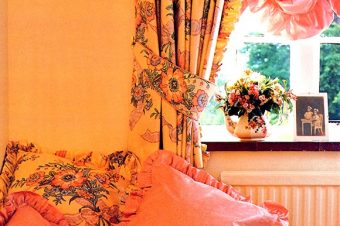
Subdued shades and a variety of textures have been used for this selection of cushions. Make the cushions in a range of sizes, to create a more random impression.
Favorite old garments that have become worn and stained in parts, or simply outmoded over the years. They need not be thrown away, but can be recycled to make a range of comfy cushions from old clothes. The cushions’ muted shades and soft, aged textures will look invitingly familiar, and help create the ambience of an established country house.
Rummage through your cupboards and wardrobes for suitable materials. A scout around local jumble sales, garage sales and second hand shops can yield some useful finds, at bargain prices. Fabric remnants left over from clothes you have made or had altered in the past can also be used to good effect, so have a good look through your sewing drawer as well.
Be sure to choose garments in toning shades, for a color co-ordinated range of cushions from old clothes. For added interest. decorate the cushions with a variety of trimmings. Many imaginative ideas can be gleaned from the garments themselves, such as using the tassel-trim, twisted cord from an old dressing gown as a border, or buttoning the cushions with old leather buttons cut from a threadbare cardigan. Wash or dry-clean the garments before you begin, and make a note of the washing instructions for reference.
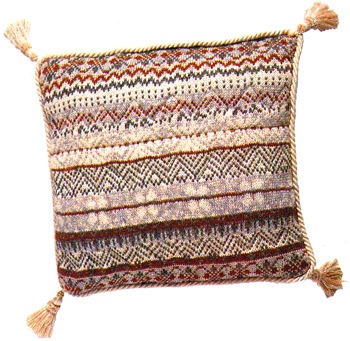
How To Make the Fair Isle Jumper Cushion
Materials
Fair Isle jumper
Twisted cord trimming – a wool dressing gown cord is ideal
Four tassels (optional)
Lightweight wadding and muslin backing fabric
2cm(3/4 in) wide Velcro
Matching sewing threads and square cushion pad
Here are step by steps for making “cushions from old clothes”
1. Cutting out
On the jumper’s front and back, mark up a square the size of the cushion pad, plus 2cm (3/4 in). Make sure the Fair Isle pattern lies straight across the squares. Machine zigzag stitch around squares to prevent fraying. Cut out just outside stitching. Cut a square of wadding and of backing fabric to same size.
2. Quilting the fabric
Machine a second row of zigzag stitching 1.5cm (5/8 in) in from the edges of each Fair Isle square. Sandwich the square of wadding between the backing fabric and the Fair Isle cushion front, with the latter right side out. Pin and tack together. Quilt across the cushion, following parts of the knitted design. Trim the wadding, if it has spread during quilting.
3. Attaching the Velcro
Cut a strip of Velcro the width of your cushion pad. Pin and tack one half of the Velcro along the lower edge of the Fair Isle cushion front, on the right side of the fabric, and theo ther along the lower edge of the cushion back, again on the right side; match up the long edges. Then stitch the Velcro in place.
4. Making up the cushion
With right sides facing and raw edges matching, pin, tack and stitch the cushion front to the back around the side and top edges, taking a 2cm (3/4 in) seam allowance; stitch right down to the lower edge of the cushion. Trim the corners, and zigzag stitch across them to neaten and firmly secure the Fair Isle. Remove tacking stitches, and turn right side out. Fold in and match the Velcro strips to seal the cushion.
5. Trimming the cushion
Cut a length of cord to fit around the cushion, plus extra for tucking in the ends. Bind the ends to prevent fraying. Slip stitch the cord around the cushion, starting at a lower corner, and stitching it to the cushion front only along the lower edge. Unpick the seam where the cord ends meet, and push them through. Re-stitch the seam to secure the cords. Fix a tassel at each corner.
Creative cushions
If your chosen garment has any eye-catching decorative features, such as a prettily appliquéd or embroidered pocket, attractive buttons or other stylish fastenings, put them to good use by incorporating them into your cover.
Reference: The Country Look—Decor & Crafts


6 Responses
10 Best Crafting Hobbies to Try at Home - Crafting DIY
[…] to give new life to old objects. You can transform everyday items like tin cans, glass bottles, or old clothes into something beautiful and functional. With a little imagination and some basic crafting […]
Tie-Dyeing Books - Crafting DIY
[…] of the Hippy era into the 21st century, she shows you how to dye T-shirts for fun, recycle your old clothes with color, make the most gorgeous silk scarves or make a bold fashion statement with ready-made […]
Bag Making Books - Crafting DIY
[…] scrap tote bag and the patchwork weekend bag demonstrate, and you will soon be able to transform an old blanket or a few scraps of discarded clothing into a unique bag in no time at all. Each project comes complete with beautifully illustrated […]
Xbox Gamer
Ive been wanting to try making my own clothes for aaaggges now but just don’t know where to start!! 🙁 I’m quite good at using a sewing machine, but the only sort of thing that I’ve made are like cushions and stuff like that, any ideas on what I could make and what to use for the first time making something. I really like the idea of making tops and maybe skirts? but don’t know what would be harder? Im kind of on a budget so the material cant be too expensive, if anyone has any ideas on how to do the patterns for cutting the material, it would really help! 😀 thank you! x
Rishi
I have tons of old bedsheets and blankets, and pieces of fabric in my basement. they arent new so I dont want to make gift type things out of them, but I dont want to throw them away either!
Any one have ideas of how to reuse this stuff?
sam N
I am supposed to get some old jean shorts or tee shirts from my closet and make something new out of them. Like making a tee shirt into a purse, or something like that. Have any ideas??
I really appreciate it!