How to Do Leaf Printing
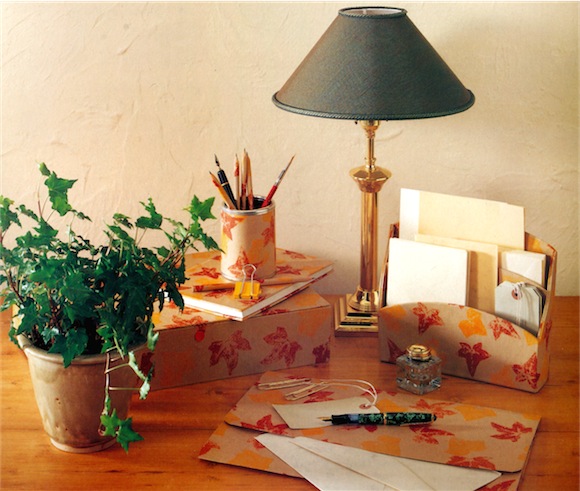
This wonderful leaf-printed desk set will add a stylish look to any workplace. It is so quick and easy to make, you could even make a second set as a special gift for a friend.
We show you how to do leaf printing so you can avoid spending a fortune on all those expensive hand-printed papers.
Why not have a go at making your own?
Turn to nature to find an attractive motif and cover sheets of plain brown paper in a riot of color. We chose shades of autumn – yellow and russet – as their glorious colors contrast well with the paper background.
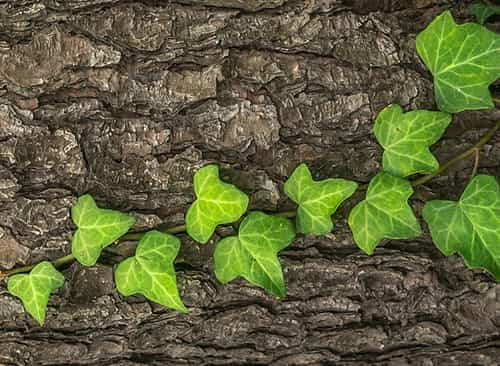
Ivy leaves are a good choice for leaf printing for a number of reasons. Not only are they easy to find, but they can be quickly sorted ready for printing. The leaves are supple, flat and evenly shaped, so are good to work with and produce a firm distinctive outline when pressed against the paper.
Once you have mastered the art of leaf printing, turn the results into a smart desk set; cover files, a letter rack – even a wastepaper bin.
Play around with color by experimenting with different paints on more unusual papers.
Although we used acrylic paints for this printing, other types, such as designer’s gouache and craft emulsions, will also produce a good result, as long as the paint is thick enough to give good cover over the leaf.
If you feel at all apprehensive about printing with leaves, try rubber stamps first. The stamps are easy to handle and produce a more uniform result, but once you master this technique, leaf printing will follow easily.
Leaf Printing On Paper – Step-by-step
Materials
Acrylic paints in two autumnal colors
Brown parcel paper
Small sponge
Ivy leaves
Spare paper
Newspaper
1. Preparing the leaves
Choose ivy leaves which are flat and evenly shaped. Sort, wash and dry the leaves, choosing separate ones for each color and different sizes to vary the pattern.
2. Practicing the printing
Put a small amount of paint on to the sponge and apply carefully to the right side of one of the leaves. Place the leaf on a spare piece of paper, right side down. Put another piece of paper over the top, being careful not to move the leaf, and press down gently on to the leaf.
3. Removing the leaf
Remove the top paper and the leaf carefully, to reveal a print. If the print is too solid you need to use less ink, if it’s too faint, add more.
4. Printing the paper
Practice until you feel you can judge how much ink is needed, but bear in mind that this type of printing produces a wide variety of finishes. When you feel confident, print your sheets of paper as described above. Allow to dry.
A Bit Of History Behind Leaf Printing & Nature Printing
Nature printing is a printing process, developed in the 18th century, that uses the plants, animals, rocks and other natural subjects to produce an image. The subject undergoes several stages to give a direct impression onto materials such as lead, gum, and photographic plates, which are then used in the printing process.
While some sources state that Benjamin Franklin invented nature printing from leaf casts, using a copper plate press, in 1737 to thwart counterfeiters of paper money bills, other sources also report Franklin’s friend, Philadelphia naturalist Joseph Breintnall, to have made contact nature prints from leaves about 1730. Together they sent nature prints which were printed directly from inked leaves to English naturalists.
Read more Here: Wikipedia
Reference: The Country Look—Decor & Crafts

Leave a Reply