Decorate With Painted Tin Cans

Keep your wooden spoons to hand in a pot decorated with a culinary motif. Painted tin cans also make cheap and cheerful containers for fresh or dried flower arrangements.
Don’t throw those old tin cans away, recycle them and make painted tin cans and use them to decorate with. Handy containers in which you can store items such as kitchen utensils, make-up brushes, or pencils can be decorated to match your kitchen china, soft furnishings or wallpaper. Instead of throwing away old tins, transform them with a coat of paint and then add a motif taken from a piece of china, wallpaper border, furnishing fabric. By tracing a motif which already occurs in the room and transferring it onto other objects the theme of the decoration can be continued in a really individual way.
Once you have tried painting motifs on throwaway objects like tins you could try your hand at painting motifs on less disposable items such as trays, cupboard doors or even furniture.
How to Decorate and Paint Tin Cans
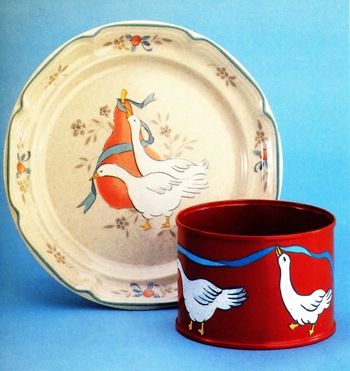
These geese are taken from a china plate and show how effectively a motif can be copied and used elsewhere.
Materials you will need:
Tin can clean and empty.
Primer for metal.
Car spray paint in background colour.
Fine sandpaper grade 00.
Rasp for smoothing the tin rim.
Enamel model paints.
Tracing paper, masking tape and pencil.
Paint brushes in a selection of sizes.
1. Prepare the tin can
Make sure that your tin can is clean, free of grease and completely dry. Using the rasp, smooth down any jagged edges around the tin rim.
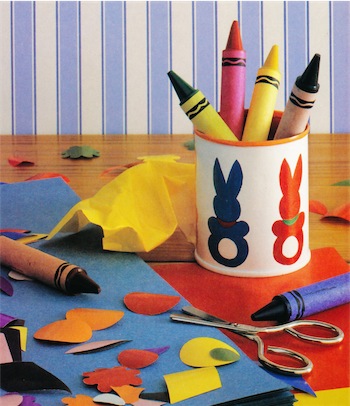
Brightly colored bunnies bring this tin to life – making a handy pot for crayons in the nursery. Model paints come in a range of bold colors which will appeal to young children. Thees are fun painted tin cans and you can get ideas from free vector picture sites.
2. Making a spray box
Place a large cardboard box on a covered work surface with the opening facing you. By placing the tin can in the box before you begin spraying you will minimize the amount of paint in the air. It is still advisable to work in a well-ventilated area.
3. Apply the primer
Rub all the surfaces of the tin can with fine glasspaper to obtain a slightly rough surface. Spray a coat of the primer on to the tin, both inside and out, then allow to dry. Rub down any imperfections with the glasspaper.
4. Apply the background color
Spray a thin coat of paint on to the tin can, inside and out, then leave the tin to dry. Repeat this process as many times as necessary to cover the primer, and give the tin can the required background colour.
5. Tracing the pattern
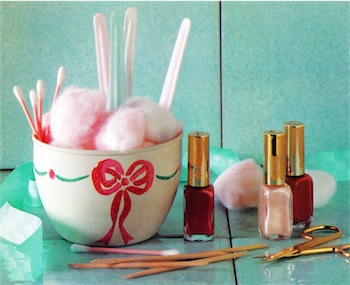
Use the bow motif to add a pretty touch to a bowl-shaped tin and use it to store make-up brushes or a manicure set. For a softer effect spray a final coat of the background colour on the finished design from a distance. Make sure the nozzle is clear and will give a fine spray.
Securing the tracing paper with masking tape to prevent it slipping, carefully trace the section of the pattern you wish to use from your favorite piece of china.
6. Drawing the design
Measure round the top of the tin and the depth between the top and bottom rims. Draw a square or oblong to these measurements on a piece of tracing paper and cut it out for a pattern. Arrange the motifs, placing them evenly over the pattern.
7. Transferring the motif
When you are happy with the design, draw along the lines of the motif on the wrong side of the paper. With the wrong side to the tin, wrap the paper round the tin and tape it in position. Retrace along the lines to transfer the motif on to the tin.
8. Painting the motif
Remove the pattern and, holding the tin can on its side in your hand, paint the design using model paint. Work a section of the pattern at a time allowing the paint to dry before continuing on to the next section.
Reference: The Country Look—Decor & Crafts


3 Responses
Easy Stencil Flowerpots In 7 Steps - Crafting DIY
[…] Make Painted Tin Cans In 8 Easy Steps […]
Hand Painting Things, Visual Art Creations - Crafting DIY
[…] Make Painted Tin Cans In 8 Easy Steps […]
Get Confidence With Using Color - Crafting DIY
[…] you have done all the steps detailed above and purchased your painting supplies, you are ready to begin painting your walls. If you have chosen something bold don’t […]