Spinning From Fiber to Yarn
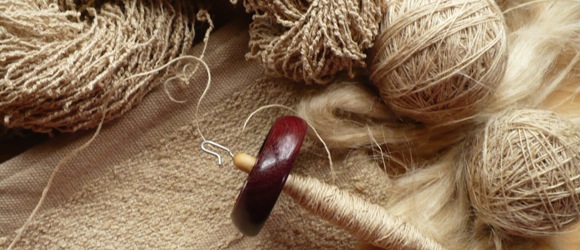
Today hand spinning—the drawing out and twisting of fiber—is still done in the way it was thousands of years ago.
Material.
Fleece is sold by the pound in three forms: unscoured, or “in the grease;” scoured, or washed; and carded, or “wool top.” Fleece that is not too dirty can be spun in the grease, but usually it requires washing.
Lay it in a bath of mild soap and tepid water, rinse in cool water, and hang to dry. Because washing removes the natural oils, add a few drops of vegetable oil before teasing.
Next the wool is carded and spun as shown below. Buy medium cards (also called medium cloth) and, if possible, a spindle with a removable whorl.
Plying yarn.
The product of spinning is called a single of yarn; for most weaving you will want to ply the yarn—that is, twist together two singles.Plying is done exactly like spinning, using the spindle, but usually in the opposite direction from which the singles were spun. Place the cones of yarn on pegs and run the yarns between the fingers while plying. Wind the plied yarn from the cone into a skein around two upright pegs. The pegs should be 18 inches apart. Tie the start of the yarn to one peg. When wound, untie the start and tie the plied yarn end to end.
Washing the yarn.
To keep the skein organized during washing, tie several figure 8’s of string around it. Wash the yarn as you did the fleece. Run a rod through the center of the skein and hang it up to dry. Tie a weight to a string and suspend it from the skein. When the top of the skein is dry, revolve it and change the position of the weight. Wind skeins into balls.
>
It takes a bit of practice to acquire the smooth, rhythmic motions that produce an even yarn and to feel confident that the diaphanous rolls of wool will actually turn into a solid strand.
Teasing and Carding
 Teasing.
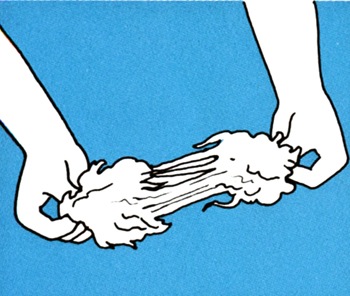
Take a small handful of fleece and pull it apart lightly with your fingers. Work from one end of fleece to the other. Repeat until it looks cloudlike and has no dense spots.
Step-by-Step Carding.
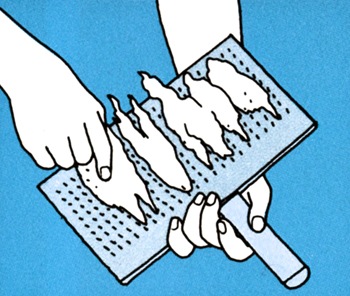
1 – Drag Teased Wool Over Card
Holding card in your left hand (if you are more comfortable using your right hand then please swop left and rights in the instructions), distribute a fistful of teased wool evenly across it. Catch fiber on the wire hooks near the edge and draw it down. Do not overload the card.
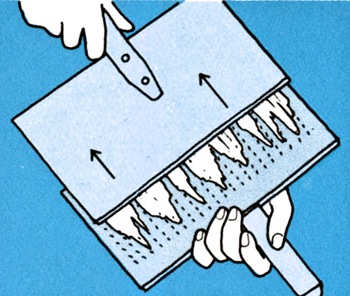
2 – Drag second card across lightly
Rest one card, held with your left hand, on your left knee. Draw the second card across it very lightly with an upward motion at the end of the stroke. Repeat until all wool is transferred to the second card.

3 – Transfer Back To First Card
Transfer wool back to the first card with a wiping motion of the second one. Keep the wool in a sheet like shape Now repeat Step 2 and Step 3 until all fiber looks uniform across the sheet.
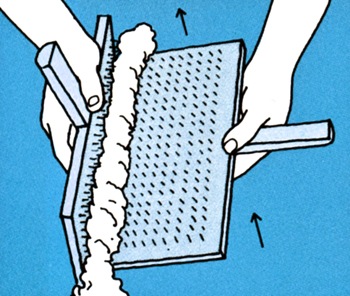
4 – Work Wool Into Light Roll
Hold cards at right angles and brush them briskly but lightly against each other several times to work the wool into a light roll. Brush upward in the direction of the handles.
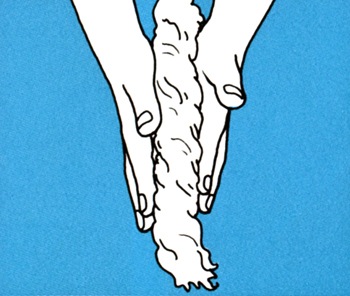
5 – Work Wool Into Even Roll
Using your hands, gently work the wool into an even roll, called a rolag. Make about 24 rolags before beginning to spin, so that spinning can continue without interruption.
>
Spinning the yarn

6 – Tie Yarn To Whorl
Tie a piece of finished yarn to the spindle above the whorl. Bring it beneath the whorl and wind it around the spindle shaft 1 1/2 times, and loop it around the notch at the top of the shaft (inset).
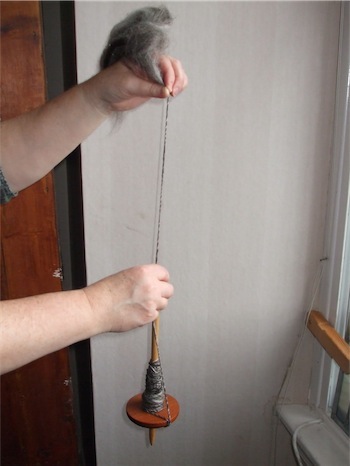
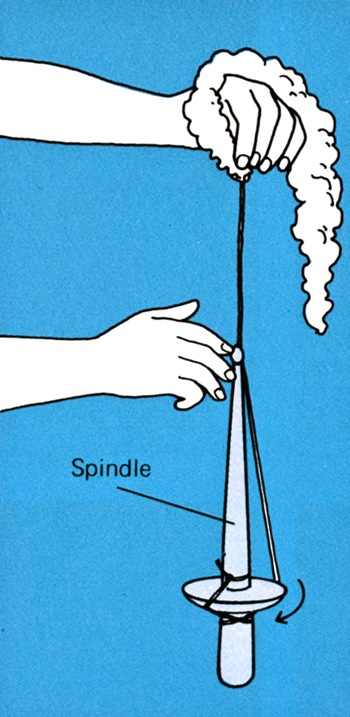
7 – Cut the Yarn And Spin
Cut the yarn to leave a 10 inch tail. Fray its end. Hold rolag (see Step 5) and yarn gently together between your fingers and thumb. Begin spinning by twirling the spindle with your free hand; then with the same hand draw out the fiber(center); now release it and spin the spindle again. Note the triangular shape of the fiber. Keep the spindle rotating. Repeat the rhythmic process of drawing out the yarn and spinning.
8 – Continue Spinning
When the spindle is near the floor, unfasten the yarn from the notch and from beneath the whorl. Wind the yarn around the spindle shaft, building it into a cone shape(bottom). Before resuming spinning attach the yarn again as in the top drawing. You can spin clockwise for Z twist, or counterclockwise for an S twist.
The yarn can be used in many CraftingDIY ways, one of them is String Art with your own spun yarn.
Reference: Readers Digest Crafts & Hobbies – A Step-by-Step guide to Creative Skills.
& Wiki Commons.


Leave a Reply