Block Printing on Fabric
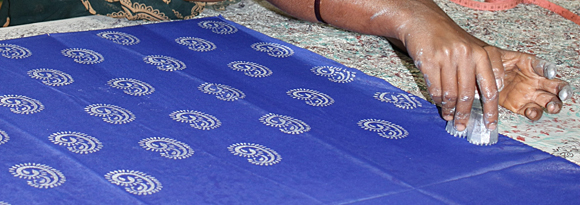
Fabric printing has been practiced since antiquity, notably in India, Egypt, and China. Throughout the centuries it has evolved from a simple process of pressing inked wood blocks on cloth into modern high-speed textile printing by sophisticated photo-mechanical processes, requiring the combined skills of designers, artists, chemists, and machinists. Mass commercial fabric printing may involve the use of engraved printing rollers; mechanized flat or rotary screens; or processes in which designs are first printed on paper, then transferred to polyester and similar synthetic fabrics.
On a much smaller scale, the craftsman employs a variety of printing methods to decorate fabric, clothing, tablecloths, napkins, and draperies. Most of these methods require only minimal equipment and supplies, are accessible to the beginner, yet can yield stunningly beautiful results.
Which Fabrics are Best.
Theoretically, any weave of any fabric-cotton, silk, wool, or synthetics—can be printed with a decorative design. In practice the results may vary widely. The colorfastness of pigments and dyes may not be uniform on silk and wool because their natural fibers vary in composition. Some synthetics may not take certain pigments well. Fabrics coated with permanent-press or waterproof finishes repel most pigments and dyes. Coarse weaves do not yield attractive results.
Cotton is the best choice for the beginner. Cotton fabrics include muslin, batiste, denim, and canvas. As you gain experience and self-confideice, you can experiment with different types of fabric and ink combinations.
Before printing, fabric must be washed to remove sizing, then ironed smooth. For a good impression, it should be laid over a soft pad (foam rubber, felt, a blanket, or layers of old newspapers). Pin or tape the fabric in place to keep it from moving.
Which Inks to use.
Acrylic paints are easy to use, but they dry stiff and may not survive dry cleaning. Oil-based printer’s inks and block-printing inks are permanent and easy to apply. Water-based silk-screen inks and textile paints come in brilliant colors and are easy to clean. However, some of these have to be worked onto the printing block carefully because of their squishy, jellylike consistency.
The Correct Heat setting to Use.
All water-based inks must be heat set 24 hours after printing. For small designs setting can be done with a hot (250ºF) iron. Cover the design on both sides with tissue paper. Move the iron back and forth over the work in the conventional way; every area should receive at least 3 minutes of the iron’s heat.
For larger designs setting can be done in a home oven. Cover the fabric with tissue paper or cloth and roll it into a loose cylinder. Heat for l0 minutes at 250ºF in an electric oven. If you use a gas oven, preheat the oven to 300ºF, then turn off the gas and put in the roll of fabric and paper.
About the Printing methods.
Fabric printing can be done using stamps, linoleum or wood blocks, stencils, or silk screens.
A stamp or block is inked either by pressing it on an inking pad or by rolling ink onto it with a brayer. The stamp is then pressed against the fabric. Larger stamps may be struck with a mallet, or the printer can stand shoeless on top of the block (called treading). Stenciling is done with a brayer roller brush (rubber brayer roller) or as stippling brush, and silk screen is printed with a squeegee. The following pictures illustrate simple methods of printing on fabric.
A Few Stamping Ideas.
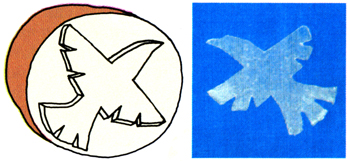
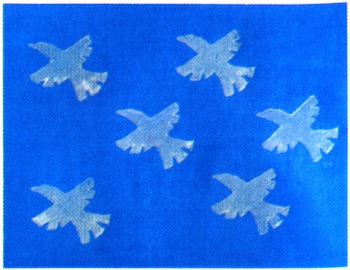
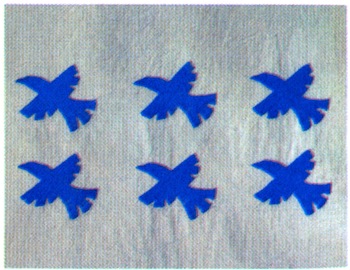
Carving stamps is the simplest method of fabric printing. The printing block is merely inked and pressed to the fabric. Elaborate patterns can be built up by repeated printings with a single stamp. The stamps can be made from many materials, including rubber, Styrofoam, wood, linoleum, and plaster of Paris. A basic stamp from a potato was used here.
How to make a potato stamp
This is a very easy way to set up your own fabric printing tools. Slice a large potato in half. Carve a simple relief design into one of the raw faces. Dry the face with a paper towel, and ink it with a water-based ink (do not use oil-based ink). A potato stamp can be kept for several days by wrapping it in plastic and refrigerating it. Carve with a razor blade or utility knife.
>
>>
>
There stamps are ideal for quaint designs for everything from children’s clothes to kitchen curtains.
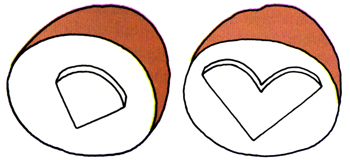
Here two half potatoes have been cut into two different patterns for fabric printing, that when combined using two colors, create a variety of whimsical patterns (below).>
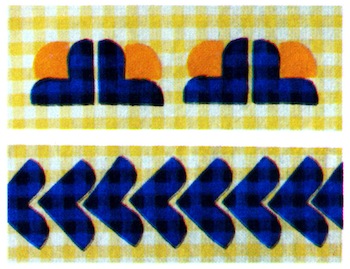
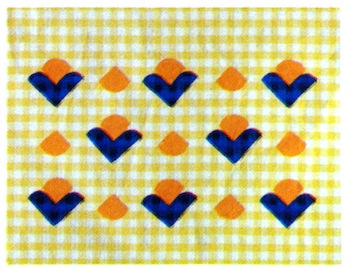
>
A Brief History of Fabric Printing.
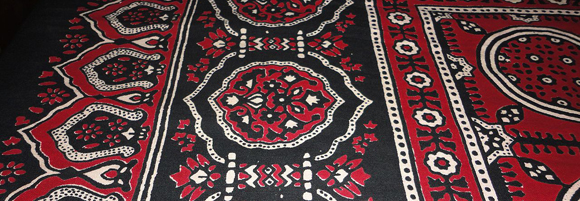
Sindh, Pakistan is the home of the Ajrak a name given to this type of block printed shawls and tiles. Block printing by stamps are used to make these elaborately designed shawls. The most common colours used in making these patterns include blue, red, black, yellow and green. For many years, ajraks have become a symbol of the Sindhi culture and traditions. You can read more about Ajrak: http://en.wikipedia.org/wiki/Ajrak
>




3 Responses
Appliqué Towels in 5 Easy Steps - Crafting DIY
[…] as a wedding) or by those who had plenty of help with daily chores. Appliqué was a way to conserve printed fabric, which was scarce. Called “broderie perse,” this technique involves cutting small […]
Fabric Painting Books - Crafting DIY
[…] quilter, garment designer, and teacher Jen Swearington comes an essential and accessible guide to printing by hand on fabric. She starts by explaining how to translate design ideas into prints, from single motifs to repeating […]
RichT
where can i find this fabric print, i need it really badly but i have no idea where to find it.
http://weheartit.com/entry/34297272/via/liihbellamy