How to Cover Things With Stamps
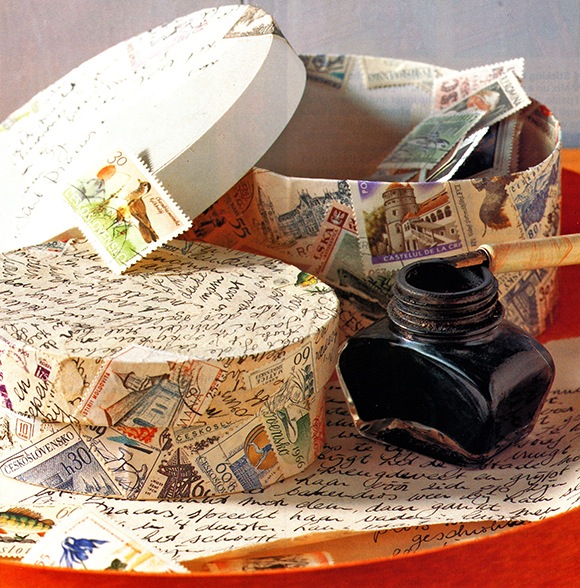
Store your treasured letters in a pretty box decorated with stamps collected from home and abroad. Adding torn scraps from favorite letters helps the stamps go further.
Even though in this modern day with emails, WhatsApp, Twitter etc stamps are a reminder of a slower pace of life. Stamps, new and used can be bought online or from dealers and 2nd hand shops.
We show you here how to cover things with stamps. A rich collection of colorful stamps is the perfect covering for picture frames and small boxes. The stamps are quick to apply and once in position provide a lasting memento of countries visited or friends living abroad. You can use stamps steamed from your everyday mail too, and by jumbling up the different colors you’ll still get a picturesque result.
You can cover things with stamps and they can be stuck in neat rows across boxes and frames, or overlapped in a riot of colorful confusion on round or unusual shaped objects. Stamps are small enough to mold around the outline of a frame so there is no need for any delicate or intricate trimming, use the stamps as they are and just layer them to cover any shape.
Stamps can also be used to hide a less-than-perfect article, quickly giving it a brand new look with this fun finish. They need not be confined to boxes and frames, but can be used to convert files and book covers or to alter small chests and cases. Stationery boxes can be easily identified with a layer of stamps and it’s the perfect way to frame holiday snaps or photos of pen pals.
Materials
Used stamps in a variety of different colors and shapes
Wallpaper paste and jam jar for mixing
Small boxes and picture frames to cover
Varnish in either satin or matt finish
Paint brushes for paste and varnish
Covering the Box
Cover the lid and base of a box separately. If your collection is meager, cover the box randomly with torn-up letters before adding the stamps. Finally add the protective coats of varnish. To prevent the letter ink from smudging, fix the ink by spraying both sides of the paper with artists’ fixative.
Covering the Frame

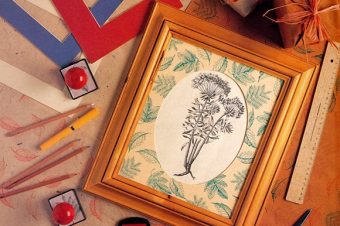
Choose a vibrant collection of stamps to cover a frame like this. The stamps mold round the frame shape, bringing it to life and providing the picture with an unusual surround.
1. Sorting the stamps
Soak off stamps from envelopes or postcards by leaving them in a bowl of cold water; once the stamp is free, leave to dry upside down on blotting paper. Divide them into light and dark colors or into special groups.
2. Preparing the frame
If an old or second-hand frame is used, lightly sand down the frame surface to remove any odd flakes of paint or varnish. Wipe over the frame with a damp cloth to remove any dust. Lay on newspapers ready for decoration.
3. Working out the design
The stamps can be stuck randomly over the frame but if you want a precise design, draw round the frame on a sheet of paper and arrange the stamps inside the marked outline. Use this as a guide.
4. Sticking the stamps
Mix up a small amount of paste, then using a small brush, evenly paste the wrong side of the first stamp and press on to the frame, making sure it follows the contours of the molding. Gently smooth over with a cloth to remove air bubbles and excess paste.
5. Covering the frame
Continue pasting and sticking the stamps over the frame. Overlap each stamp with the previous one to hide the frame base completely.
6. Neatening the edges
It is important to cover the inner and outer edges of the frame so that it looks smart from any angle. Make sure that the stamps overlap the edges all round and stick them on to the wrong side. When the whole frame is covered, leave it to dry.
7. Varnish the frame
Paint over the whole frame with varnish. When varnishing the frame, place it over four blocks of waste wood so the sides can dry without smudging. Cover with 3 to 4 coats, leaving them to dry between each coat. If necessary, gently rub down with fine glass paper or wire wool between the last two coats.
Collecting stamps
Small packs of mixed stamps can be purchased quite cheaply from stationery or stamp collector shops. American stamps are renowned world wide for their good designs, so don’t worry if you haven’t got any foreign stamps among your collection.
I am sure that you will be able to cover things with stamps once you start to look and find all those items that could do with a makeover.
Reference: The Country Look—Decor & Crafts



Leave a Reply