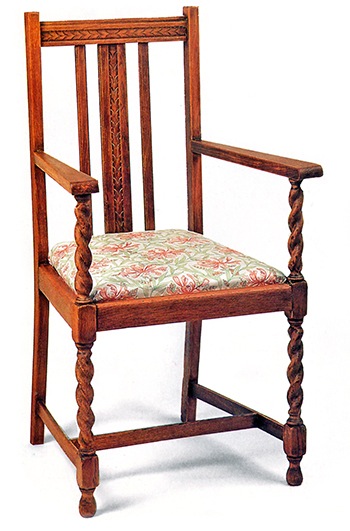
How to Reupholster a Drop-in Seat
A chair with a drop-in seat that you can reupholster and have transformed with a new cover in a few hours. No sewing is necessary, and since all the work is done on the underside of the seat, it doesn’t even have to be neat.
You can reupholster a dining chair with a drop-in seat easily and smarten up and made to match new furnishings with a change of cover. Choose an elegant damask or needlepoint fabric for a formal effect, or a pretty floral for something fresh. As long as the fabric is hard-wearing, any medium to heavyweight furnishing fabric can be used for a reupholster.
Re-covering this type of chair need not be a major operation since the seat lifts out for easy handling, and it may be that only the top layer of fabric needs to be replaced. Just 1m (1yd) of fabric or less will be enough to cover most chairs, and if the fabric has only a small or random pattern, this amount may be enough to cover two chairs.
Start by checking the state of the wood, and if necessary clean and re-finish it before you start on the fabric. Remove the outer layer of fabric, and if the layers underneath are in bad condition, remove them one by one until you get down to a sound layer.
Types of upholstery
The traditional drop-in seat upholstery comprises various layers of fabric and stuffing which give the seat its firm, but comfortable shape. Strips of strong webbing are stretched across the wooden seat frame in each direction to give the chair its base. A layer of hessian goes on top of this and then the horsehair or fibre mixture which makes up the main part of the seat. A layer of calico secures the horsehair and helps to prevent it working its way out. Cotton or polyester wadding on top of this adds extra insulation for the horsehair and softens the overall effect, providing a smooth surface for the furnishing fabric which goes on top.
Some modern chair seats are padded with foam which is placed on a hardboard or chipboard base and then covered with polyester or cotton wadding and then fabric. This is a quicker way of upholstering a seat, but not as durable or as comfortable as a traditionally upholstered seat.
Materials
Furnishing fabric of upholstery weight, 10cm (4in) larger all round than the fabric section of the chair seat.
An old screwdriver and a pair of pincers to remove old tacks or staples. A tack or staple remover will make this easier, but it is probably not worth buying one unless you plan to do several items.
Hammer and 16mm (5/8 in) upholstery tacks or a staple gun and staples. Staples are easy to use, but hard to take out. Professionals swear by tacks which can be partially nailed in fora temporary positioning and then knocked home when the arrangement has been finalized.
Fabric protector (optional).
If the layers underneath the main fabric are not in good condition, peel them apart to see what you need to replace. If the seat is upholstered with traditional materials, it may be necessary to replace the wadding and possibly also the calico, but it is unlikely that you will need to replace the remaining layers unless the chair is in very bad condition. If the chair is upholstered with foam, this can be replaced quite easily, especially since many suppliers will cut it to shape as part of their service.
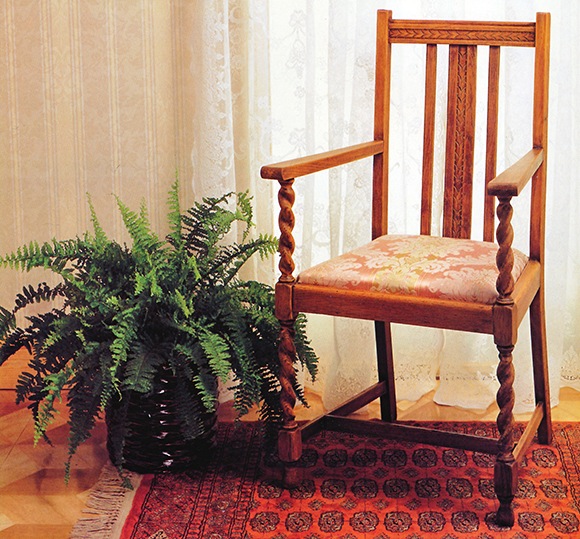
Recovering & Reupholster a Drop-in-Seat
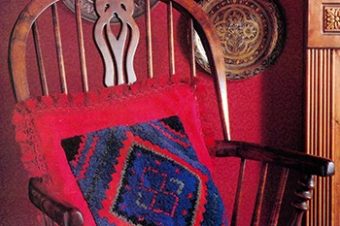
A floral chintz gives this chair a fresh but informal look, ideal for a cozy sitting room or kitchen.
1. Removing the old fabric
Push the seat up and out from underneath. Turn it upside down and remove the tacks or staples holding the fabric to the wooden frame. A staple or tack remover makes this easy, but tacks or staples can also be removed by carefully levering them up with a screwdriver and then pulling them out with pliers. If they are difficult to remove, try ripping off the fabric round them to make space underneath for the screwdriver. If a tack has lost its head, hammer the remains into the wood so that it does not catch on the new layers.
2. Arranging the fabric
If the foam or wadding under the fabric is in good condition, all you need to do is replace the main fabric. Wrap the fabric loosely round the seat and stand back to survey the effect. If it has a large pattern or stripe, rearrange it to find the most pleasing effect. Always center a large motif.
3. Temporary tacking
With the lengthways grain running from front to back, and with the pattern arranged as required, place the fabric right side out on the chair seat and then turn the whole thing upside down. Knock a nail halfway into the wood at the center of each edge as a temporary tack, with the fabric pulled taut. Alternatively fix a staple in these positions.
4. Tacking the edges
Starting at the front of the seat, temporary tack or staple the fabric along the edge with the tacks spaced 4cm (1 1/2 in) apart. Tack the opposite edge and then the two side edges, pulling the fabric taut as you work, and leaving the corners free. When satisfied with the effect which should be smooth, hammer all the tacks home.
5. Finishing the corners
Open out the fabric at the corners and hammer a temporary tack in the centre to hold (omit this stage if using staples). Fold the excess fabric on each side to the centre to make a pleat and tack or staple in place; remove the temporary tack.
6. Finishing shaped corners
Some chair seats have two corners with small square indents which accommodate the chair legs or backrest. Make a temporary tack in the center as for a standard corner, pulling the fabric taut in the gap. Fold the excess fabric under to make pleats at each of the outer points and tack or staple in position; remove the temporary tack.
7. Neatening the underside
If required, take a piece of spare fabric – hessian, calico, or lining fabric will do – and cut it 2.5cm (1in) larger all round than the frame. Turn under 3cm (1 ¼ in) all round so that it is slightly smaller than the seat, and tack to the base of the frame to cover all the raw edges and to protect the stuffing layersf rom dust.
8. Preserving the fabric
Once the seat has been re-covered, spray it with fabric protector to extend its life. Any marks which do get on the fabric should be removed with fabric dry-cleaning fluid.
Planning Ahead
Tacks which are hammered deep into the chair frame are difficult to remove when it comes to re-covering the chair again. To make it easier to remove the fabric later, do not hammer the tacks completely flush with the fabric.
Replacing the Layers of Padding
On a seat padded with foam, it may be worthwhile replacing the foam at the same time as the cover in order to extend the life of the seat and give it a fresh appearance.
On a seat traditionally upholstered with horsehair, it probably won’t be necessary to replace all the layers unless the chair is in particularly bad condition. However, sometimes the wadding can wear thin and the horsehair starts to come through the calico, so these should both be replaced.
If the horsehair underneath the calico is in bad condition, it may be possible to top it up with new horsehair without completely renewing it; to renew the whole layer requires a bit more skill. Calico and wadding are widely available, but horsehair or its equivalent is available only from upholstery suppliers.
Replacing the Foam
1. Measuring up
Remove the old fabric and foam from the chair seat but leave the hardboard or chipboard in position. Draw round the seat on a piece of card to make a template for the new foam. Send the template to the foam supplier and get them to cut the foam to size.
2. Completing the seat
Place the cut foam on the seat and cover with a piece of cotton or polyester wadding to soften the edges, 1cm (3/8 in) larger all round (optional). Attach the fabric cover in the usual way (see steps above).
3. Replacing the Calico
Remove all the layers on the chair until you get down to the horsehair stuffing. Cut a new piece of calico to size and then fix to the chair in the same way as the main fabric, following the instructions on the previous pages but keeping the tacks well back from the inside edge where the tacks for the main fabric will go. If the frame is full of holes from previous tacks, the calico can be fixed to the sides of the frame instead, but make sure that the seat will still fit in the chair.
4. Replacing the Wadding
Traditionally cotton wadding is used on top of the calico to give the seat a soft, smooth finish, although 70g (2 ½ oz) polyester wadding is an excellent alternative. Simply cut to the shape of the pad, adding 1cm (3/8 in) all round to cover the sides of the seat. Position between the main fabric and the calico or foam and fix the main fabric on top, following the instructions above.
Reference: The Country Look—Decor & Crafts


3 Responses
Michael K
say something about chairs please., thanks
PolishPokeyPimp
I have several yards of faux silk that I believe are intended for draperies or some type of home furnishing. I like the color though and want to make a dress from it. Is there any reason why this wouldn’t work? Anything to keep in mind when sewing with this type of fabric?
Franklin Bluth
I don’t know how to work with these two colors. I have a beige sofa and love seat which I plan to give my apartment a brown/tan/beige feel to it. I heard the brown color creates a calming affect. However, I have to work with two bluish-green recliners. The carpet will be a brownish gray color and the walls are white. The living room is a typical square shape. This is what i have so far. I need advice on arrangements and any additional decorating items/suggestions that will go with the calming affect i had intended in the first place. Please help me. thanks