How To Make Your Own Painted Tulip Napkins
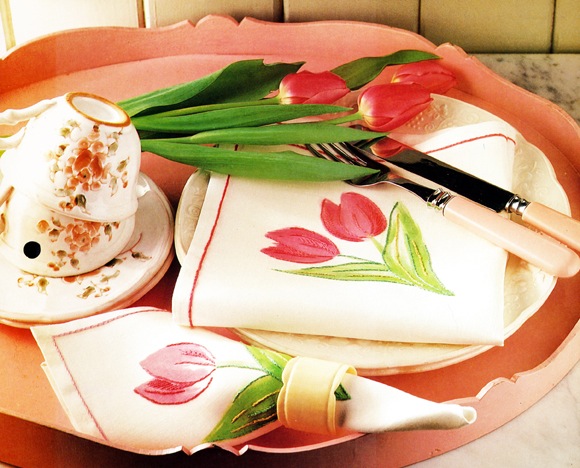
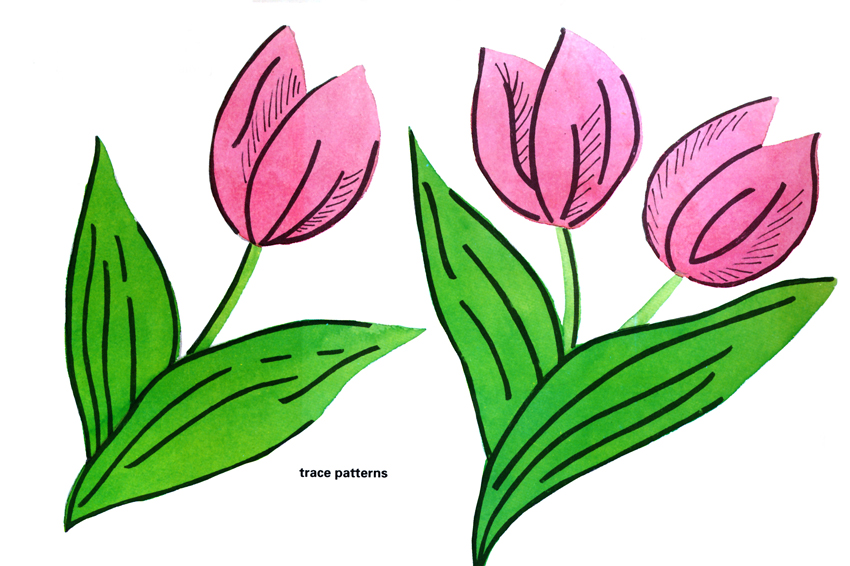
These simple tulips have been painted using a few bold strokes of color. Use the template as a guide, starting with a pale wash and adding a darker shade to outline the shapes. On a set of napkins, vary the motifs using the single flower on some, double on others.
Painting motifs on to fabric, then working simple embroidery stitches over them is a pretty way of making your table napkins totally original.
Use this tulip motif or choose a favorite flower and paint it on a plain napkin, adding embroidery stitches to highlight or define the design.
Motifs could also be painted on to other soft furnishings – cushion covers, table or tray cloths.
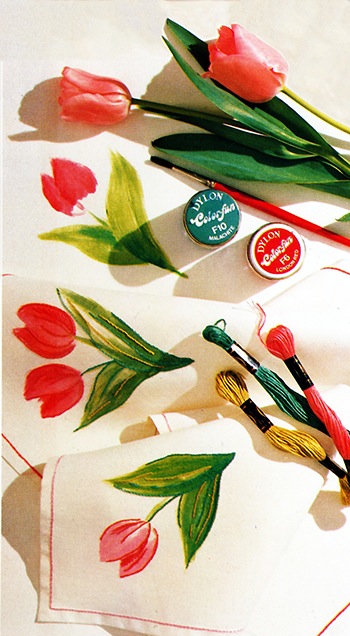
Materials
plain purchased napkin
dylon color fast fabric paint, one jar in each of Malachite Green, London Red and White
medium paintbrush
Anchor stranded cotton one skein each jade 189, pink 10 and sand 945
crewel embroidery needle
dressmaker’s carbon paper
To Work the Motif
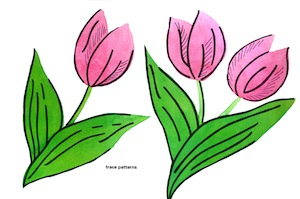
1. Transfer the design
Trace the tulip on to the napkin using dressmaker’s carbon paper.
Click here to download full size trace patterns.
2. Paint the tulip
Using white paint mixed with red and green to achieve different shades, paint the flower following the traced outline. Before painting the napkin, practice on paper to workout the effect you wish to achieve. Leave to dry, then fix the design on the fabric following the maker’s instructions.
3. Embroider the motif
Using two strands of embroidery cotton work stem stitch to outline parts of the design in stem stitch, following the bold lines on the pattern. Use pink for the tulip head and sand and jade for leaves and stem
4. Adding texture
Using two strands of pink, work filling stitches on the tulip heads following the fine lines on the design.
5. Embroider the edge
Using two strands of pink work chain stitch around the napkin, along the hem.
Stem Stitch
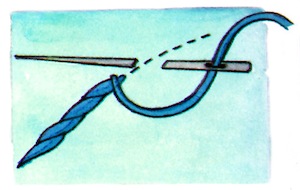
Working from left to right along the line of the design, bring the needle up through the fabric. Insert the needle to the right, angling it to emerge half a stitch length back.
Chain Stitch

Working from right to left, bring the needle up through the fabric. Holding the thread in a loop with your thumb, insert the needle at almost the same place. Bring it out a stitch length away, along the line to be embroidered, with the thread loop under the needle.
Reference: The Country Look—Decor & Crafts
One Response
Christmas Napkins - Crafting DIY
[…] while the border is worked with two rows of machine-stitched satin stitch. Simple leaf motifs are painted all over the second napkin, using a fine nibbed fabric pen—you can even add a personal message of good cheer. A fabric […]